Adapting a USA driver’s license template to fit specific requirements involves a mix of design skill, attention to detail, and awareness of legal boundaries. Whether creating a prop for a theater production, designing a mock-up for a graphic design portfolio, or exploring state-specific layout differences for educational purposes, tailoring a template requires methodical steps. This guide breaks down the process, from understanding core components to addressing common challenges.
1. Grasping the Structure of a USA Driver’s License
Before making changes, it’s critical to recognize the standard elements found on most state-issued licenses. These components vary slightly by state but follow a consistent framework:
- Personal Information Panel: Typically located on the right or left, this includes full name, date of birth (DOB), address, license number, and expiration date.
- Photo Area: A high-resolution image of the license holder, often with a specific size (e.g., 1.5”x1.5” in many states) and background requirements (neutral, no shadows).
- State-Specific Logos and Seals: Each state includes its official seal, motto, or emblem, often in a corner or border. For example, Texas integrates its lone star symbol, while California features a grizzly bear.
- Security Features: Holographic overlays, microprinting, UV-reactive ink patterns, and barcodes. These are harder to replicate but may be included in mock-ups for authenticity.
- Endorsements and Restrictions: Small sections noting vehicle classes (e.g., Class C), endorsements (motorcycle, commercial), or restrictions (glasses required).
Studying real licenses from the target state (via DMV websites or public records) helps identify these elements accurately. For instance, Florida licenses use a vertical layout for under-21 users, while New York uses a horizontal format for all ages.
2. Selecting the Right Tools for Customization
Customization success depends on choosing tools that balance precision and accessibility. Here are key options:

Graphic Design Software
Professional tools like Adobe Photoshop or GIMP (free) allow pixel-level adjustments. Photoshop’s layer system is ideal for editing individual elements (e.g., swapping photos without altering the background). GIMP, while less intuitive, offers similar features for users on a budget.
Vector Design Tools
State seals and text often use vector graphics (scalable without quality loss). Adobe Illustrator or Inkscape (free) are better for these tasks. For example, re-creating a Wisconsin state seal with sharp edges requires vector editing to maintain clarity.
Online Template Editors
Platforms like Canva or Adobe Express offer pre-made license templates with drag-and-drop features. These are great for quick, non-professional projects but lack the detail needed for accurate replicas (e.g., exact color codes or microprinting).
For most users, a combination of Photoshop (for photo and layout edits) and Illustrator (for vector elements) yields the best results. Beginners may start with Canva to learn basics before moving to advanced tools.
3. Step-by-Step Customization Process
Step 1: Collect Accurate Reference Materials
Begin by gathering examples of the target state’s license. The official state DMV website often provides sample images or PDF guides. For instance, the California DMV publishes “What to Expect” brochures with license mock-ups. Note details like font styles (many states use Arial or a custom sans-serif), color hex codes (e.g., #003366 for blue in some Northeast states), and element placement (e.g., DOB above the photo in Arizona vs. below in Nevada).

Step 2: Modify Personal Information
Use a template with editable text layers. Replace placeholder names, DOBs, and addresses with desired details. Ensure font size and color match the original—for example, New York licenses use 8pt font for addresses, 10pt for names. Avoid stylistic fonts (e.g., cursive) since real licenses prioritize readability. If the template lacks editable layers, use the “Type Tool” in Photoshop to overwrite text, matching the original font’s kerning and spacing.
Step 3: Adjust the Photo Area
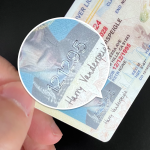
Replace the stock photo with a high-resolution image (300 DPI minimum). Crop it to the correct dimensions (check the state’s requirements—Florida uses 1.75”x1.25”). Use tools like the “Lasso Tool” to remove backgrounds, then match the brightness/contrast of the original template. For a more authentic look, add a subtle border (1-2px, dark gray) around the photo, as seen on many state licenses.
Step 4: Edit Design Elements
Alter colors using the “Eyedropper Tool” to match state-specific shades. For example, if replicating a Texas license, use Pantone 186C for the red in the state seal. Adjust borders—some states (e.g., Illinois) have a thin, embossed-looking border—by adding a “Stroke” layer style in Photoshop (1px, #666666, 50% opacity). For logos, either trace the state seal in Illustrator (using the Pen Tool) or find a high-res vector version from public domain sources.
Step 5: Add (Optional) Security Features
For mock-ups needing realism, replicate security elements:
- Microprinting: Use 2-3pt font (e.g., “State of [State]” repeated) along the license border. In Photoshop, type the text, reduce the font size, and place it strategically.
- UV Ink Patterns: Add a separate layer with faint shapes (e.g., stars, state outlines) using a pale yellow or green. Mention in notes that these are visible under UV light.
- Holographic Effects: Use a gradient overlay (blending mode: Overlay, opacity: 30%) with colors like silver and light blue to simulate a hologram’s sheen.
4. Legal and Ethical Boundaries
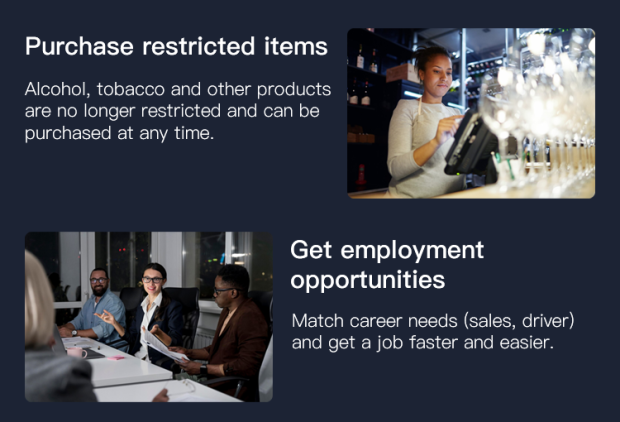
It’s critical to emphasize that creating a fake driver’s license for fraudulent use (e.g., buying alcohol, identity theft) is illegal under 18 U.S. Code § 1028 (Fraud and Related Activity in Connection with Identification Documents). Customization should only be for:
- Educational projects (e.g., design students studying document layout).
- Theatrical props (with clear markings like “Prop – Not Valid ID”).
- Portfolio pieces (labeled as “Mock-Up” or “Design Exercise”).
To avoid legal issues, add a watermark (e.g., “Sample” or “For Educational Use Only”) across the template. This prevents misuse and clarifies intent.
5. Verifying Your Customized Template
After customization, cross-verify against official sources:
- DMV Comparison: Download the latest license sample from the state DMV website. Check if colors, font, and element placement match.
- Peer Review: Ask a second person (e.g., a designer or someone familiar with the state’s license) to spot discrepancies.
- Print Test: Print the template on matte photo paper (to mimic the license’s texture) and compare to a real license (if available) under different lighting conditions.
For example, if customizing a Colorado license, ensure the “Centennial State” motto is included below the state seal, as per current DMV guidelines.
Common Problems and Solutions
Problem 1: Fonts Don’t Match the Original License
Issue: Many states use proprietary or hard-to-find fonts (e.g., “Frutiger” for some state IDs). Generic fonts like Arial may look off.
Solution: Use font identification tools (e.g., WhatTheFont by MyFonts) to match the original. If the font is proprietary, use a close alternative (e.g., “Univers” for Frutiger). Note the substitution in mock-up notes.
Problem 2: Photo Looks Pixelated After Resizing
Issue: Low-resolution images become blurry when scaled to the required size (e.g., 1.5”x1.5”).
Solution: Use high-res photos (300 DPI) from the start. If resizing is necessary, use Photoshop’s “Image Size” tool with “Bicubic Smoother” interpolation to reduce pixelation. Avoid enlarging images beyond 120% of their original size.
Problem 3: Security Features Look Unrealistic
Issue: Microprinting or holographic effects appear too bold or indistinct.
Solution: For microprinting, use a 2pt font and place it along the edge of the license (e.g., next to the barcode). For holograms, use a gradient with 20-30% opacity and “Soft Light” blending mode to mimic a subtle sheen.
Problem 4: Template Doesn’t Match the State’s Current Design
Issue: States update license designs periodically (e.g., New York’s 2020 redesign added a vertical format for all ages). Older templates may be outdated.
Solution: Check the state DMV’s “Driver License” page for the latest version. Many sites (e.g., Texas.gov) publish press releases or image galleries of new designs.
Problem 5: Legal Concerns About Distribution
Issue: Sharing customized templates online may be misused for creating fake IDs.
Solution: Watermark templates with “Prop Only” or “Educational Use” in large, semi-transparent text. Avoid sharing editable files (e.g., .PSD) publicly—distribute only flattened, low-res JPEGs for viewing.